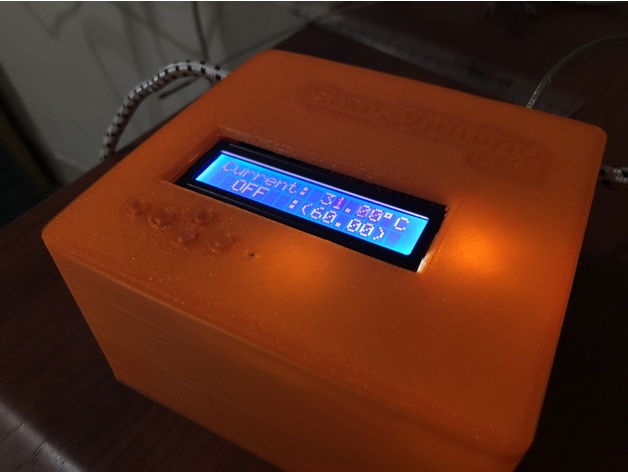
Well, not necessarily an upgrade from MK1, but more of a remake on the same thing, minus WiFi and App, but plus LCD and buttons, and now that I have a 3D printer, a perfectly fitted enclosure. It is a simplification. I can’t use the same code because the Spark folks has drop support for the Core, took me like an hour to get “blink” running on it. It’ll be faster to remake it from scratch. And using a self-signed app is annoying for others in my family that could’ve use this as well.
That said, I made this with 100% spare parts, so personally I spent $0 on this. I bought an Uno clone and LCD shield for “prototyping” purposes, but it never left the anti static bag. It is always faster to jump directly prototyping on the board I actually plan on using, zero code adjustment.
The longest part of this build is waiting for the enclosure finish printing. If you need a guide for this, just follow the Sous Viduino by Adafruit.
Links: enclosure and code. A quick breakdown on my specific setup:
- Arduino as the brain, and Uno because I want to use the LCD Shield.
- LCD shield to simplify things. I’ll have buttons for interface. Up / down to control the temp by 0.5ºC increments, left / right control by 5ºC. The set button to start and stop the PID. 1
- Temperature sensor as PID input, I use the type K with MAX6675, because I bought quite a few of it right before people jump to MAX31855. Even the DS18B20 will work as well.
- Fotek 40A SSR is fine, it’s good enough to control the rice cooker. Utter shit as a product, I wouldn’t trust it as mission critical projects, but I already have 4 of them because they’re like less than $2 each.
- And I can’t remember the exact module code for the Aliexpress AC to 5VDC module to power the Arduino from the same plug. 12VDC into Vin pin would be better, but regulated 5V into the 5V pin is fine.
Downside with this rice cooker setup that you’ll need to make sure that the temp sensor is in the bath when the PID is working or you’ll boil whatever you’re cooking in the bath. I have one occasion where the probe pop out for some reason and the water reached 70ºC when I wanted 60º.
I plan on doing something like a “thermal runaway” protection in the code like in 3D printers. See if the temperature isn’t rising after a certain time while the heater is “on”, kill everything.
Also, I saw this Anova teardown, it is so simple. That thing is literally the same as this project, but instead of rice cooker, just add a $2 submersible heating-element, and a motor to “circulate” the water. I see MK3 in the horizon, another perfect project for #CoronaCraft.
Footnote
1: This LCD Shield is terrible idea, it is super annoying to use. I'd 100% use a potentiometer to set the temperature for MK3. ↩