Here’s the continuation of the Anet A8 Upgrade series. Here’s a link to part 1 if you missed it. This part will basically just a list of printable objects from Thingiverse. I’d consider most of these as “free” upgrades. I know you still pay for the filaments and electricity, but I’m not printing objects professionally. Like unless you’re an Uber driver, you’d just lump your car’s fuel cost as living cost, right?!
1. Filament Guide
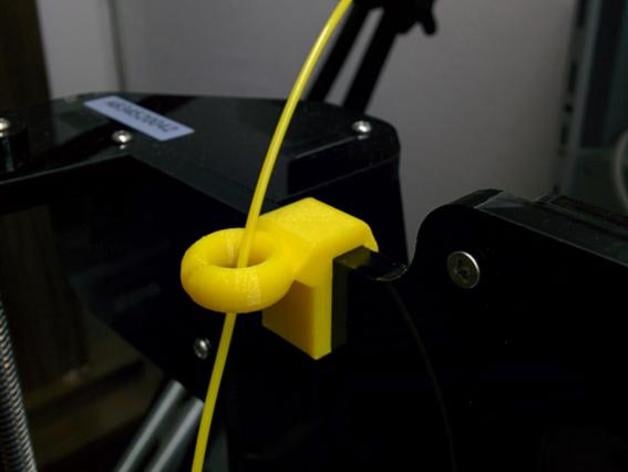
There are plenty of these things in thingiverse, but the ones that sit right above the extruder doesn’t make any sense to me. They’re big, hard to print, and doesn’t really help the filament to flop around the printer and making it very likely to snag on something. The one I linked to is great. Easy to print, sit right in the acrylic frame around the top.
2. Extruder Button
Save your thumb. You’d feel the need for this after the very first time loading in the filament. There are plenty of other designs, I actually printed this one, it’s easy to print and doesn’t require any tight tolerances.
3. Thumb wheel
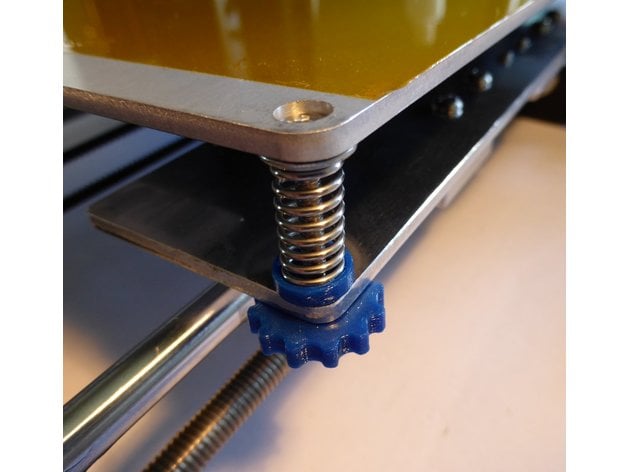
The wing-nut that Anet came with were terrible for bed leveling micro-adjustment. Luckily, for some reason I didn’t need to drill out my H frame. Again, there are many other design, I chose the one that seems easy to print.
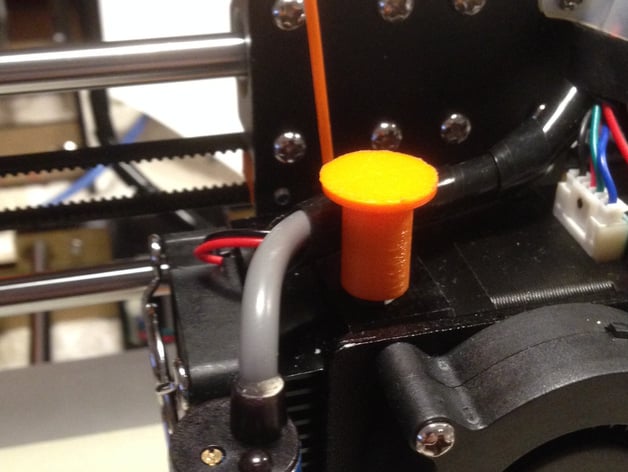
4. Removable Cold-end Fan
One of the very first major mod I did on my Anet A8. Changing filament blind was the major design flaw on the A8. I mean it has a lot of flaws, and cut corners where possible, but the blind filament loading is a design problem.
There are other options, but most of them (if not all), requires the complete removal of the heatsink. That is just doesn’t compute in my head. The even crazier ones were the one that put the fan above the extruder motor, what the heck are you cooling from there?
For the next couple upgrades, I highly recommend getting a softer fiberglass timing belt. You may need a replacement while doing these upgrades anyway.
5. X-axis Upgrades
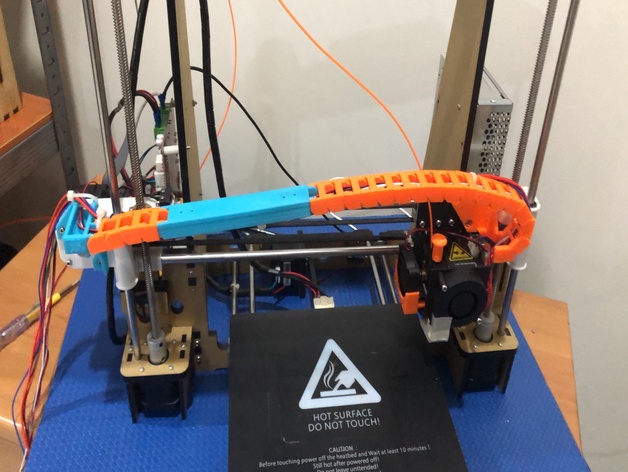
Although the chain seems like just for aesthetics, but in my case specifically, the hot-end heater wire out of the box were too short for normal routing (where you route it over the right of the LCD and over the top hole), I needed to flip the mainboard upside-down, which makes it very hard to reach the SD-card.
Adjustable belt tensioner is a feature that should be available out of the box. And you can replace the stiff belt while installing the tensioner.
Alternative tensioner thing. I think this is a good alternative if your printer is not enclosed. Easy to install with current setup.
6. Y-axis Upgrades
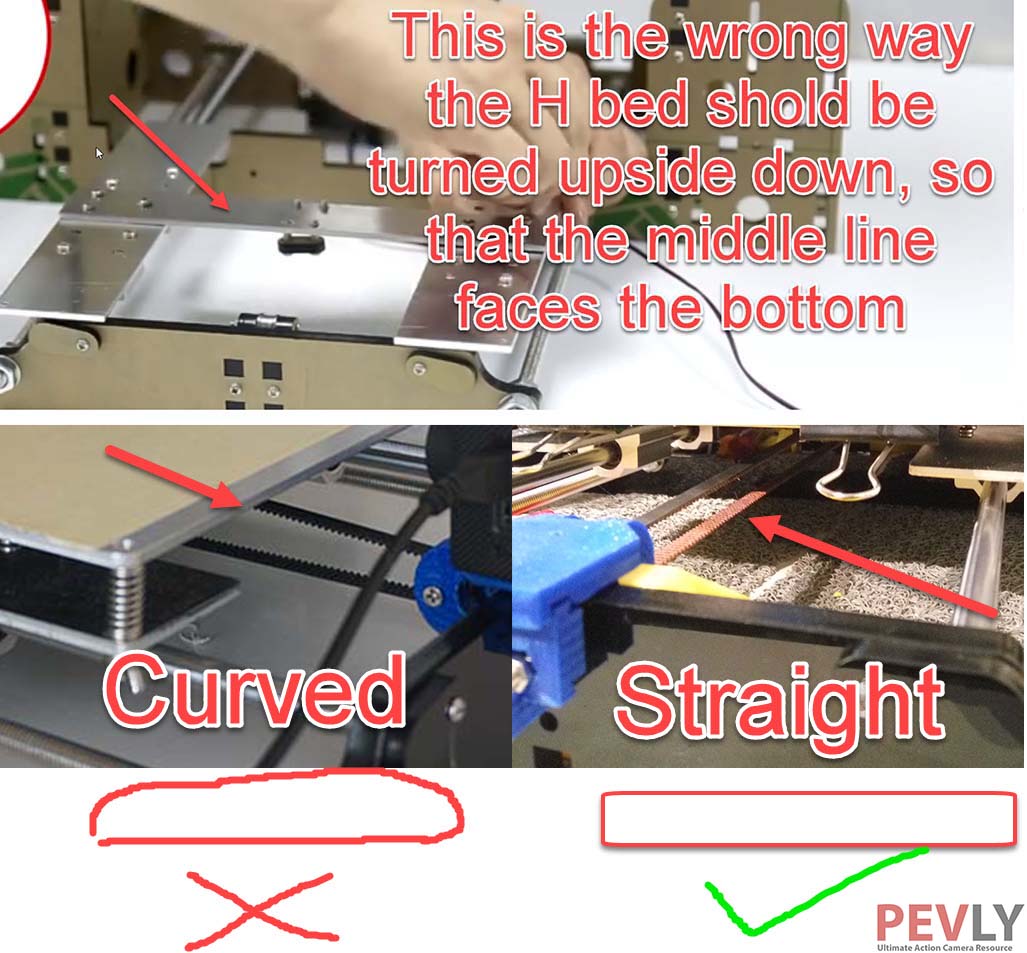
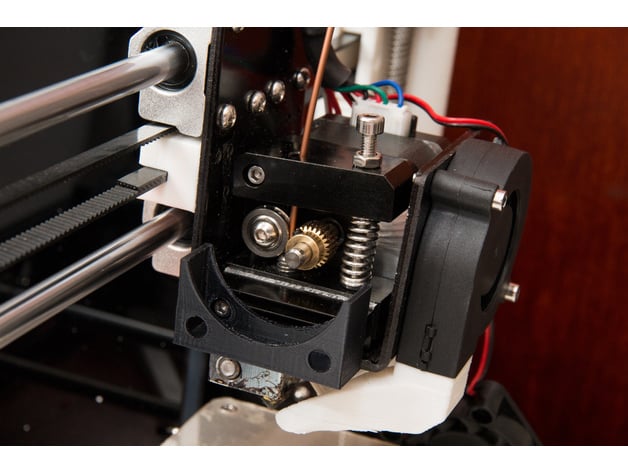
- Flipping the H bracket (pictured above). And replace the belt clamp while you’re at it.
- Belt tensioner. Again many other options, I think this one has the largest thread thus easiest to print.
- Y-axis chain. I actually put mine on the right side so the nozzle will never crash into the clip and the chain. Just mirror the mount and choose the thinner H frame remix to safe some plastics.
With the Y-axis chain will completely remove the strain on the molex connector. This will remove the need of soldering the wires directly to the bed.
7. Frame Braces
Personally I haven’t printed any of these, they’re way at the bottom of my list. These things take forever to print and with the exception of the hulk brace, I don’t think the rest are worth printing. The lower frame is going to be as stable as the table you put your printer on, if your Y tension is bending the frame, then it’s too tight anyway.
There you have it, the printable upgrades to Anet A8. Next part, the last part, will be the ultimate / crazy upgrades to the Anet A8, making it the ideal printer. Making it the ideal 3D printer, because at that point, you will understand every little nook and cranny of the Anet A8.
Final note: please do not use these “anti-Z wobble” things that add a bearing to the top of the threaded rods (like this one). Those threaded rods are meant to have a slight wobble, that’s where the guide rods and X-tensioner comes in. Here’s how you should install the threaded rods in the z coupler.