Here are the links to part 1 and part 2 in case you missed it. The final part of the Anet A8 upgrade series, the final form. This will be the only upgrade that I put a price range because all of these upgrades combined will cost more than the printer itself, although to be fair, you kinda just built yourself a new printer if you did all of these.
Update: I completely replaces #2 and #4 on this post after further research and testing with my own device.
1. Auto Bed Leveling ($5 - $50)

This one is a no brainer, removing the need to bed level is a huge convenience bump. It can cost you from $5 (DIY) all the way to $50 (an original BLTouch). Honestly, even though the BLTouch is the “be all and end all” of the Z-probe sensor, because it works on all surfaces including glass bed, but it costs 1/3 of an Anet A8. Meanwhile 3DTouch ($10 - $15), the clones, people have had mixed reviews.
After the stock proximity sensor made my nozzle crash into the bed on multiple occasion, I don’t think any of those proximity sensors work on glass bed anyway.
Which leaves us with DIY, there are many options. 3D printer community is filled with creative folks by definition. Starting from the jankiest where they just stuck a button onto a servo, all the way to making it as good as a commercial product. These ones all boiled down to use an optical endstop, a flag to trigger the endstop, a flag pole, and a servo to stow and deploy the pole.
Here’s a list of some DIY options:
- Anet A8 Optical Z-probe: the very first probe I actually made, it’s not pretty but mounted very close to the stock nozzle.
- BFPTouch: arguably the original commercial looking DIY z-probe
- Compact Opto Servo Probe: Smaller BFPTouch.
- Tiny Touch MK2: Smallest among them.
- KeyTouch ABL: You’ll need to remix it from Ender 3 to Anet A8, this is still very new (I haven’t found any Anet remix yet). Simple and smart.
2. Extruder & Hot-end ($120)
Titan Extruder & E3D V6, easy. Next!
LOL, no. Original titan extruder cost like $55 without the motor, and original E3D V6 will cost about the same. That brings the total close to 60% of the whole Anet A8, just for the extruder + hot end kit.
But, we’re on the right track. I highly recommend the bowden option if you’re willing to scratch TPU and NinjaFlex out of your filament choice. There are a lot of of guides and mounting options for the titan and v6 for all kinds of printers out there. They’re very good, easy to assembly, and so many cheap clones on Aliexpress. Before you get on the high horse, Anet A8 itself is a cheap clone of a Prusa printer. And unlike the 3DTouch, people has better luck with these.
E3D Hemera is currently the best upgrade option for the A8 hotend & extruder replacement. No clones available for it, but give it a bit time. I no longer consider a bowden setup as an upgrade. It introduces unnecessary problems, and at best is a side step. I can print better and faster with A8 stock extruder than using a Titan + V6 bowden.
3. Metal Frame ($25 - $50)
There are two major option here:
- EMT8: Cheaper option, like in the name, it uses EMT — Electrical Metallic Tubing. $25 according to the Thingiverse.
- AM8: This one uses Aluminium 2040 profile (which is the same materials used on the Ender printers). I’ve bought the non-printed parts for this, got more than everything for $35 (I bought a lot more screws and T-nuts for spares and to attach other things). Check your local hardwares supplier, online doesn’t always mean cheaper.
Between the two, I’m leaning towards the AM8. It is lighter and more versatile, just slide a T-nut in and you can attach anything on the frame.
If you count the printing time, electricity, and the plastic cost of all the frame braces, these metal frames aren’t that much more expensive.
4. Main Control Board ($50)
This is the section where we starts to see diminishing return on investment. I mean, sure if you break your board, it caught on fire, or something, might as well upgrade to the RAMPS 1.4 (plus Arduino Mega of course).
While cutting and re-crimping your cables aren’t fun, RAMPS opens up a whole lot of flexibility. Option to get higher-end / quieter stepper motor driver. You’ll get an extra slot for another extruder (not really worth the mod effort IMO). And you’ll get a lot more space from Arduino Mega. On my stock v1.5 board I’m at the point of removing SD card support (which I don’t use anymore after Octoprint) from Marlin so it’ll still fit. IIRC, the default Marlin configuration for RAMPS only uses 20%-ish of memory. I think you can enable everything in Marlin and it’ll still fit.
That’s about it. You may still need the external mosfet (at least the one for the bed), because some RAMPS can also uses a sketchy parts and the connector can be just limited to 10A.
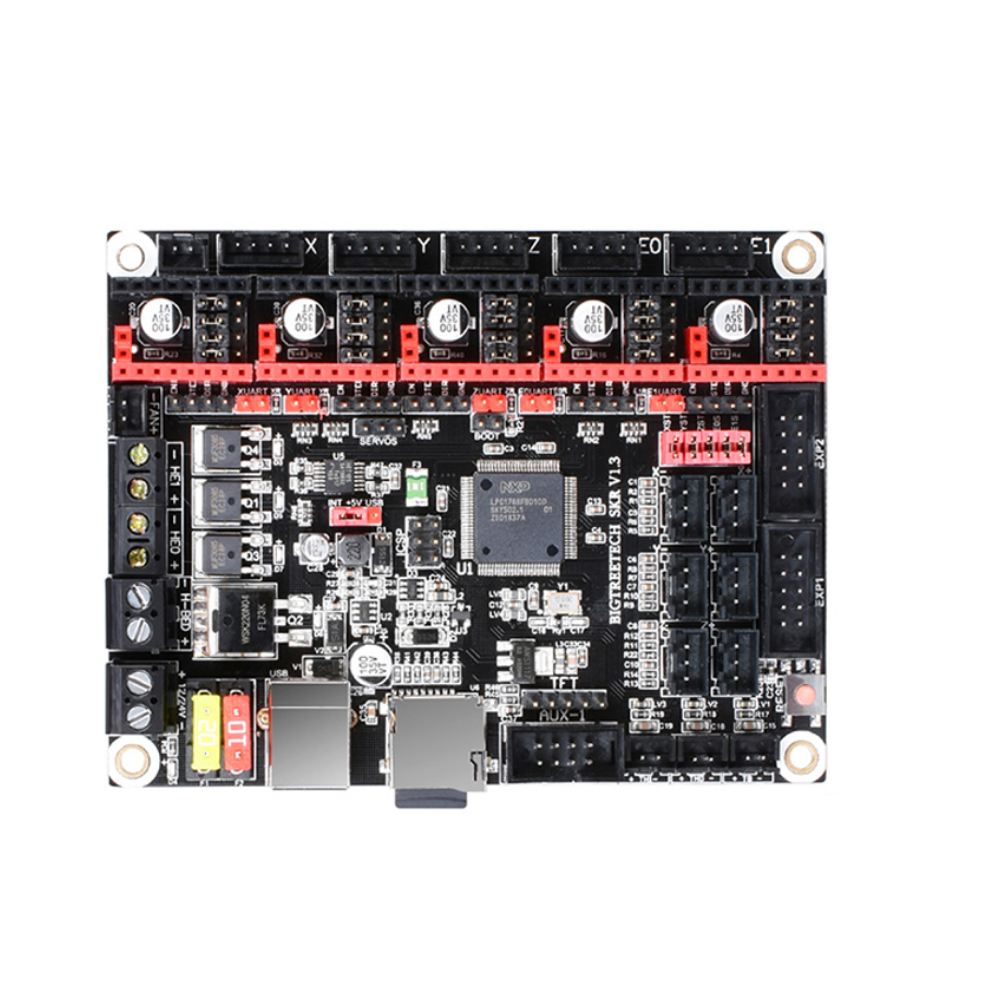
Why use RAMPS that's very likely to use sketchy and under spec-ed parts while you can get a 32bit board like SKR v1.3 from BigTreeTech for about the same price. And get the TMC2209s driver for it. Plug and play with UART interface, so we can adjust the current with a terminal or from the printer itself. And has option for sensorless homing incase the button was broken for some reason.
5. Linear Rails Upgrade ($40 / meter)

a.k.a BLVmod. This mod replaces the linear bearing to use MGN12 linear guide. Honestly, this feels like unnecessary upgrade unless you did all of the above upgrade and want to use two direct drive extruder and retain the print speed. I put the price per meter because I haven’t look far into this.
If you for some reason borked the Anet’s linear bearing (loose balls, or something), just get a DryLin linear bearing. They’re very smooth, quiet, and don’t have balls. Even before DryLin, I’d give this thing a go.
Bonus: 110/220 VAC Silicone Bed Heater
This is one of the most recent upgrade I made. I bought a bed insulation foam expecting that it’ll be enough to retain the heat with the fan going at 100%, or at least enough power to do PID for the bed. I was wrong, bed insulation helps a little bit, but not enough for PID tune.
I put this as a bonus because it’s quite crazy mod, especially for those who never play with AC power before. However this is a very interesting mod. The heated bed is biggest power suck out of any 3D printers, that’s why we did the mosfet upgrade, so the bed draws power directly from the power supply unit. Now by adding the 220 VAC heater, we also relieve the PSU off 10-13 amps draws by the heated bed alone. It means that the mosfets are no longer necessary, and the original 20A PSU will be plenty cool to run.
Conclusion
There you have it, this is the end of the upgrade series. At this point for another ~$100-$300 you’ll get an almost entirely different Anet A8. Cost wise, you’d get a better printer out of the box if you get literally anything else, you’d definitely get an Ender 3 for under $250.
However, the lesson learned from upgrading the Anet A8 is priceless. From doing most of these upgrades myself, and from researching and thinking about what I would have done to the Anet, I’m quite confident that I’ll be able to build my own 3D printer from scratch with my own specs at cost.
As I said in my review, Anet A8 probably the worst 3D printer out there, but they’re the cheapest and the best 3D printer to learn a lot about 3D printing.